Thursday, December 4, 2008

Final Project: Final revisions


Final Revisions:

1) Each drawing is set to play automatically when the next step is reached. Each drawing can still be replayed with the "show drawing button."

2) The intro has been condensed into one page.  It has the same text as the three pages collectively had before, yet puts more emphasis on the actual steps while keeping the number of pages without drawings to a minimum.

3) The "show drawing" and "previous" buttons are now disabled on the first page.  They were not supposed to be clickable, and now the mouse does not prompt them to be clicked either.

Monday, December 1, 2008

Beta Revisions


In this iteration of the final, the required materials for the tutorial are located on the first page.  I changed the font from Comic Sans MS to arial for its readability. The interface has been tweaked a little, now with the title of the tutorial, as well as each lesson in the upper right corner, above the text.  This way, the user is not forced to look in many different places for information. The lesson names have been simplified as well, indicating only which part of the face is drawn.  The buttons for navigating the pages have had their text replaced with arrows.  This way, fixing the kerning issue and simplifying the buttons themselves.  The "show drawing" button remains the same, albeit with different text, due to its specific function.

...Do my revisions make the interface more user friendly, and the program more effective in getting across it's information?

Tuesday, November 25, 2008

Final Project: BETA


To recap:  

One can navigate through different steps with the "next" and "previous" buttons.  Navigating to the beginning of each specific part of the face is done with the "black buttons" at the top of the program.  Clicking "show drawing" will draw out each step in the tutorial.  "Show drawing" can be clicked multiple times, at the user's discretion.

Revisions:

  • All animations done.
  • Changes to final drawings made. All drawings are now smoother and refined.
  • All interface buttons work.  Code has been put in so that the user can find his or her place in the tutorial regardless of how one navigates (the black guides above, or the prev. and next buttons.)

Comments:

When playtesting my project, and demoing it to its target audience, the common consensus among them was that having options to draw different sets of eyes, noses, and mouths would make the tutorial too complicated, and divide the material's subject matter up too much.  Because of this, I have omitted the option to see different facial features drawn, only keeping the options for creating multiple hair styles.

However, the program has been created in a way that the hairstyle chosen by the user, should they choose a hairstyle, is reflected in the final drawing at the end of the tutorial.

Thursday, November 20, 2008

Final Revisions


Current revisions:

Updated the user interface to indicate which step in the tutorial is currently being done.
Also enabled the buttons at the top to move to specific spots in the tutorial, indicated by that which is drawn in the step.

Wednesday, November 12, 2008

Proposal Edits:


Edit::

Clicking this link will take you to a runthrough of my program. NOTHING IS ANIMATED, yet you can see the final interface and read the actual tutorial.

Note: ONLY THE NEXT AND PREV buttons work. The "show drawing" button will draw each step when i finish it.

The operation guide gives an overview of each element of my program.


Due to the class critique Tuesday, I have reconsidered and revised a few of my ideas in my proposal.

Outside of school, I tutor middle school students in math and science. As I have grown to know them, I have discovered that many students at that age have a love for drawing and creation as well. Because of my status as an artist, many of my students want to learn some of the techniques that I have learned through my career. They want to learn the basics of drawing people in a simplistic, visually comprehensible method. Unfortunately, they have found many tutorial books to be largely the same and fail in producing images that are easy to follow. For my final project, I want to create an animated, interactive drawing manual for drawing heads. I originally wanted to do a full character, but there are books of information on drawing the head alone. This way, i can be more in-depth on a specific topic as opposed to resorting to a slew of generalizations.

The aesthetic will mirror the look of its target audience’s drawing materials; featuring a notebook paper background and mostly black and white drawings. ((Because other individuals may find the notebook paper aesthetic a bit distracting, i can include an option to change backgrounds. )) I want the interface to be easy to use, so each drawing and step-by-step guide will be navigated via point-and-click menus. Many of my students feel that they too often see a guide written that only shows the end result of each step, leaving the methods for arriving at the final drawing left in the dark. To alleviate this, each drawing step will be explained with text and animated illustrations. At the end of each tutorial, I want to include an option that lets the user customize the face that is drawn, incorporating different facial expressions. (I am still considering different styles of drawings as well, but that is currently tentative.) Clicking a feature brings up a slider menu that lets the individual choose an expression then see details on each style. I think that this will help my tutorial succeed where many fail, by providing actual video documentation of the “work” between each step.

I am not sure how many tutorials i will have in the final version, although i will have a maximum of 3, and if i do have more than one, each will slowly increase in difficulty.

Monday, November 10, 2008

Final Project Proposal

EDITS:

While talking to Dakoda, we discussed a few revisions to my plan that would make my final project stronger. The first is incorporating sound.  Sound effects such as a pencil scratching on paper, and possibly a soft looping track in the background would aid in engaging the user.  It would help to keep them entertained, as it is easy for children at that age to lose intrest.

He said it may be a good idea to incorporate a transparent grain or texture over a white background, instead of notebook paper, to simulate paper.  He also said to make sure my project is very intuitive, while maintaining a simple interface.


Outside of school, I tutor middle school students in math and science. As I have grown to know them, I have discovered that many students at that age have a love for drawing and creation as well. Because of my status as an artist, many of my students want to learn some of the techniques that I have learned through my career. They want to learn the basics of drawing people in a simplistic, visually comprehensible method. Unfortunately, they have found many tutorial books to be largely the same and fail in producing images that are easy to follow. For my final project, I want to create an animated, interactive drawing manual for cartoon characters.

The aesthetic will mirror the look of its target audience’s drawing materials; featuring a notebook paper background and mostly black and white drawings. I want the interface to be easy to use, so each drawing and step-by-step guide will be navigated via point-and-click menus. Many of my students feel that they too often see a guide written that only shows the end result of each step, leaving the methods for arriving at the final drawing left in the dark. To alleviate this, each drawing step will be explained with text and animated illustrations. I think that this will help my tutorial succeed where many fail, by providing actual video documentation of the “work” between each step.

I currently want to have 3 tutorials that slowly increase in difficulty and use elements from the one before; one for drawing faces, another for drawing bodies, and one for drawing both in multiple perspectives.


Thursday, November 6, 2008

Drum Machine


Version 1.

Each of the buttons for the different instruments is clickable. Once clicked, one of three musical patterns is played. There are 2 instances of each instrument a design choice i made to augment the current shortcomings my flash program has to fully fledged drum machine programs. Most basic beats created are from the same 4 instruments i've used here, but in those programs one benefits from having the program time beats for them, and match them up accordingly. I figured that my drum machine would function differently, throwing digital timing completely out the window, and letting the individual play with timing manually.

Sound is something that takes a while to get right, especially in a program such as this, where the options one gives the user in sound clips and repetition has to work together regardless of the combinations chosen. There are 2 copies of each clip just incase one would like to extend tracks, or try to get interesting effects by overlapping some. I've noticed that one can create some dynamic patterns by clicking multiple patterns of the same instrument.

For the color scheme of this, i decided to take a departure from my usual pastel preferences, and focused on something a bit basic, to reflect the drum machine's ease of use and current functions. Is this new scheme aesthetically pleasing? Or is it more of an eyesore? What about the functionality of the program? Do u see the benefit of letting individuals time their instruments manually? Or would you prefer a synchronization feature?

(Note: In retrospect, i notice that i could get more realistic combinations of music if I have volume sliders set to each individual instrument, as opposed to one master volume control.

Wednesday, October 29, 2008

Review of "Tune Toys: Muse-O-Matic" and Outline for Audio Project

 I will admit that i was pretty skeptical when i first read the description of Tune Toys: Muse-O-Matic.  I was, however, quickly silenced upon tinkering with the programs Mr. Tim Thompson created.  Tune Toys is a collection of musical generators based upon user input of words and phrases.  As a musical toy, i find it very interesting how an individual is able to create music with great ease, see a visual image indicating said music, then play and save the music created to one's computer. It is an interactive program that utilizes 4 out of 5 senses to create a fully realized, interactive piece that is utilized across multiple mediums.  For the record, one feels much joy when typing in one's name or one's favorite website and a a fully realized piece of music is created.


---------------------


Outline:  Manual music creation tool.

Inspired by:  Retro Drum Machines


Overview:  Have the program set up to have sound effects, ambient noises, sounds from everyday life, etc.


Plan for now:  Have each track play when clicked.  Also have options to edit each track selected in terms to pitch, speed, and volume.  Also have options for playing all, pausing all, and stopping all tracks available.


.....I am still working on my track selection, but it will be a mix of tracks created from garageband, ambient sounds from free-to-use music sites, and live sounds i record myself.  


I would also like to maybe add some visual indication of what is playing as well. Wether it is radio waves, images of what is playing, or abstract aesthetics has not been decided upon at this time.

Tuesday, October 28, 2008

The Halloween Photo Booth: Results

Our photo booth was a success.  We received more feedback than expected; enough to verify our previous questions in regards to human reaction.  What was interesting, however, is the variety of reactions we received from people in regards to our booth setup.  Some not only returned the desired facial response, some even reacted verbally... much to our amusement.  We ended up recording video to track all facial reactions that the camera might have missed, as well as for record-keeping purposes.  In time, we will edit our video footage into a web-friendly format and filesize on http://reacttime.blogspot.com as an extra treat for those who participated.  In the meantime, we have our footage in raw and compressed formats, saved for viewing and editing.

One thing that we all agree upon in regards to our project is to conserve tape space as well as battery life when documenting.  We learned this the hard way, as we ran out of tape just before witnessing what was one of our favorite reactions of the day from none other than Adrian Duran.

We are still thinking of ways to expand our project. From expanded concepts, (confessionals was one that stuck with us), to expanded tool sets (monitors for viewers outside of booth,  scary image and sound selection to keep things interesting, etc,) we have ideas concerning how we can expand on our project.

One of the things I think we should be careful about is to keep it from becoming a one-trick pony of sorts.  True enough, we created an environment where we had total control of when and how we scared individuals. However, if we plan to make this a semi-annual thing, it is important to consider ways of keeping the atmosphere, sound, and imagery geared towards overwhelming the senses, no matter how many times one frequents our booth.
----------------------------
Now that we have the tech and layout figured out, there are so many possibilities for what we can do for future projects. For the record, I have never been one to do many installations. However, i do believe that we have a formula that can be manipulated and expanded on to create a wide range of interactive installation pieces.   Making the experience very personal, and divided from the rest of the world is what i think works best for our project. As a group, we spoke briefly on creating a confessional complete with a digital priest.  Allowing one to go in and type whatever they're thinking anonymously would be a great means of venting for some.  We could also include some video and audio files that strengthen the experience.

Among all of the projects possible, the confessional is something that i definitely think I should do sometime in my artistic career.  With some tweaking, it can be very effective.

Thursday, October 23, 2008

The Halloween Photo Booth: Desensitization Expieriment

We propose an experiment that serves as an activity for students and other individuals to partake in during lunchtime. We wanted to make something that fits the spirit of Halloween, lets individuals take pictures, and gives them an opportunity to view their photo as well as the photos of others. In the spirit of Halloween, we wanted to make something that the potential to be somewhat startling. Because of this we decided to make a Halloween-themed photo booth that lets us carry out our own experiment involving human reaction. Our title for this is “The Halloween Photo Booth: Desensitization Experiment”.

Desensitization is, by definition, the act of making something less sensitive, sometimes by gradual exposure or overexposure to an object. Many people believe that due to changes in media, people in this age have become desensitized to themes associated with fear and thrill. This can be seen in the change in the majority of horror films’ themes from “shock/thrill-fest” to “tragic humor.” Halloween is the part of the year that makes “fear and thrill” into an annual ritual of enjoyment. We wanted to capitalize on that ideal for the sake of our experiment.

Our experiment is as follows:
We have realized that desensitization is not measured as an “either/or.” It is instead measured as an amount. For every individual, many factors play into one’s ability to be startled. We wanted to disguise our experiment as an elaborate activity that others can enjoy. This elaborate activity is our photo booth. Using visual cues and sound, we established a control by which to measure individual levels of desensitization to unexpected media. Once in the photo booth, we prompt the individual to put on a set of earphones. An audio cue will play so they know when the picture is being taken. Our interface is set up so that we can watch as the individual focuses their attention to the screen while waiting for his or her picture. As we take their picture, our image and sound plays in the booth, amplified by the somewhat claustrophobic environment we have set up

One way or another, the individual will react to the image and sound. What we want to find out, however is if that reaction is enough to generate a facial response. If so, this would indicate to us the most heartfelt reactions an individual can make. Results of our data collection is set up as http://reactime.blogspot.com, a blog that allows individuals to print the images of themselves as well as their friends that participated. There we can tally the results of our experiment, and generate a conclusion from our recorded findings.

We are using the Sleaze and Slime as the location of our project in hopes of getting a larger audience for our work. We are depending on word of mouth, (something we have already started,) timing of the event, as well as visual indication of our project to encourage people to participate. Since we will be showing it during lunchtime, we believe our photo booth will be considered a nice activity to do as individuals wait for class to start again at 1:00 PM. Our blog with posted photos encourages each individual to go to the blog to see their picture and the pictures of others. We believe that the opportunity to see who was and was not startled by our setup is enough to get some traffic on our blog. This way, they can take our data, save it, and manipulate it as they see fit.

Note: Because some individuals may be uncomfortable with having others view, or manipulate their photo, we have a short disclaimer that requires one’s signature, indicating that he or she is comfortable with having one’s photo displayed. This is a way for us to document the number of people that actually participate and keep us from being held liable for anyone else looking at our collection of photos.


Peer Reviews:

To accomplish our project, different tasks were delegated to each member. Me and Anthoney worked primarily on our interface and code for our project, while Scottie and Quaaim handled the aesthetics of the installation. Contributing equally, we exchanged feedback between each other about problems and solutions to every roadblock we faced. Making the code for our project was a group effort as well; We took input from Scottie and Quaaim as well as tested our project among a few people and took feed back from that as well. Having all of us meet on time was a problem every now and then, but we utilized other sources to stay in contact with each other about the work. Dropping files on the server was a big help.

All in all, everyone contributed equally.

Thursday, October 16, 2008

Revised Video Project


Following the advice of the class, i expanded upon my original idea a bit.

First major change is the tv's widescreen format. I agree that this supports my idea a bit better. I want to figure out how to upscale the video feed itself, if there is even a way.

The best way my idea could be expanded upon is to incorporate more functionality of the tv to convey my idea a bit clearer. Because of this, i added a tv guide. Thanks to someone's suggestion, i implemented the idea of television stations, the tv shows of which all incorporate a synonym of "self," the subject that the individual watches when viewing my project. Some of the synonyms are a bigger stretch than others as far as coherency is concerned. Also some have numbers and suffer a case of "sequel-itis" in regards to showing up repeatedly. This reinforces my original idea of television shows being mostly stale, uninspired, copied, then packaged and repackaged under different names.

Monday, October 13, 2008

Revisions and Video Expierement

First off... my video expierement.....


.....complete with old-school rabbit ears.

This experiment was inspired by my own issues with post-2003 television... namely that while most mainstream television shows, while being interesting for a moment, are ultimately copies of one another and genuinely uninspired. Seeing a camera's portrayal on one's reality may seem interesting at first, but as the individual flips through the channels, the user becomes ultimately bored turns off the tv.

...For the record, i do enjoy quite a few shows nowadays. However, this experiment reflects my own opinions.  What is your opinion of television nowadays?

------
Here is all of my revised work.  Revisions to each work of art will be displayed below the image to the work itself:


Digiscape Image:  Updated image to incorporate elements from my final digiscape.


Digiscape Project (Counts as 2 assignments. The original, then the update with full tweens, timeline effects, etc):  Fixed some timeline issues that created conflicts with the simulation of depth and seamlessness in the animation.


Ghost FPS:  Fixed a bug that made ghosts stop moving once killed.


Ghost Hunt : (previously revised outside class on another blog post):  Fixed an error that broke t the game mechanics, rendering the scoring system, level progression, and ultimately, the game, unplayable.

Bird Demo: Fixed a bug that makes the bird well when being fed a mosquito AFTER it already passes out. Now it can only be revived via a Med Pack.


Character Creation Utility: Reinforced my original concept and added a button that lets one print one's creation.

...Questions? Comments?

Thursday, October 9, 2008

Midterm Project: Character Creation Utility


Make your own character.

As an animator, one must be adept at many things; color harmony, storytelling and perspective to name a few. One very important aspect of animation that one must always consider is character design. The root of any good animation is the full development of a character's look and feel, as it is from that that the animator develops how said character moves throughout an environment. Because of that, i used this dealer's choice project to develop something that would help me further my own character development studies.

Here i have three robots i have created, split into 5 parts. Each part can be mixed and matched with the parts of the other robots to create an entirely new creation. A help button can be moused over to provide instructions for one who may have any questions. The order in which you place objects determines their positioning. I set it up this way to encourage thinking not only of the positioning of objects, but their relationship with each other when making a unified composition. (similar to building blocks.) Once done, you can print your creations.

This idea is actually inspired by Rapid Idea Sketching, something I learned in IPC last semester. One takes many materials pertaining to a specific topic, mixes and matches them together, and photographs the results. The reason for doing this is to find compositions and concepts in your existing work that you may not see otherwise. I used the same basic concept here while incorporating elements that pertain to my specific intentions.

In short, I saw this project as an opportunity to make something that applied directly to my major that could benefit me in the long run.

Making it was not a problem, but did take just about forever to finish. Even now, there are many things that I would like to add to this. I feel that i could incorporate even more designs, more form and functionality, color choices, and even more backgrounds, if time permits.

Thursday, October 2, 2008

Drag and Drop Demo

Meet your new pet.

This project is designed to demonstrate the drag and drop action in flash.  The bird can interact with a number of objects on the side.  Depending on the object you choose, the bird reacts differently.  If fed a number of mosquitoes, the bird will become sick, and refuse to do anything but feel sorry for itself.  Feeding it one more will make it die.... until you feed it a medical pack.  I set it up this way to mirror individuals who like taking care of pets as well as those who get amusement out of the misfortune of fabricated creatures.

In all honesty, i did not run into any major difficulties when programming this, it just took a lot of time. I came across the idea of making certain animations that i want to do invisible on the main timeline until i want to actually play them.   It also took a bit of figuring out in regards to the assignment of variables as well.  However, once fixed, everything flowed nicely.

As always, logic errors are a pain.

Note:  What do you think of the program as a whole? Is it too colorful?  Are the pastel colors too much?  Should i use a different color scheme?  What about the spacing of everything?  I know this is just an experiment, but i am open to all ideas and options in regards to improving it.

Wednesday, October 1, 2008

Ghost Hunt: Update


Click to Play.

For critique tomorrow, it has been updated, with the bug that "breaks" the game fixed. Turns out i needed an if, else if statement that we learned in class today for my game to support both conditions. Who would have thought?

Anyways, I took the advice of the class and created a level progression system, and and system for losing. It was always my intention to create a program that mimics the principles of games of old. Because of that, i have focused my game around a few things:

1) Simple, pick up and play mechanics.
2) An easy introductory level to familiarize one with the game mechanics.
3) Rapidly increasing difficulty past level 1.
4) Analyzing the patterns of each wave of enemies to find the best way to complete each level.

There are only 2 levels at the moment, but I am hoping that the increase in speed and difficulty between level 1 and 2 conveys the intentions i had when creating this.

My main difficulty i ran into was in trying to figure out the error i had before, with getting each level to progress. I realized that i had two seperate conditions that i was trying to fulfill with one statement, and by organizing my code and being careful not to override commands of the same function, I was able to complete this without having any bugs... that i know of at least.

I will be posting my next assignment later tonight once its finished.

Tuesday, September 30, 2008

Ghost Hunt: Near Completion


Done, but i screwed it up somehow.

Almost completely revamped. Increased difficulty level, and added a second level that mirrors the trend in classic games of presenting a huge challenge to the gamer. I also added a background as well. Everything is a go, except that i have somehow produced a logic error that prevents users from advancing to level 2. I think it is just something i am over-looking, but at the moment after countless rereads and revisions, i am stumped. Any ideas?

Here is my code for advancing to level 2.

var score = 0; scorebox.text = score; function scoreIncrease() { scorebox.text = ++score; }

var scoreb = 0;
scorebox.text = scoreb;
function scoreIncrease() {
scorebox.text = ++scoreb;
}
/* This creates a variable called "score". It sets it's default value to 0 when the game
starts. The dynamic text box "scorebox" gets assigned the value, "score".
NOTE: this means that variables when asked to show up as text (.text) appears as such.

A function, "scoreIncrease()" has been created. When called, it will take the score, and
add 1 to its value. (++score.))
*/

var miss = 0;
missCount.text = miss;
function missPlus() {
missCount.text = ++miss;
scorebox.text = scoreb + 0;
}

bkg.onDragOver = function() {
msgbox.text = "(c) 2008, Napalm Justice Productions"
}

onEnterFrame = function(){ if (score >= 2){ gotoAndStop(4); } }
bkg.onRelease = function() {
missCount.text = ++miss;
}

onEnterFrame = function(){
if (miss >= 3){
gotoAndStop(5);
}
}

/* Advances game to next level, or game over screen. Here,
the game over screen is set to frame 2 of the main timeline,
and set only to show if the score is higher than 20.*/

It is set up exactly like my miss variable, but it still will not work, although you can die without problem. Any ideas on what i am doing wrong?

Thursday, September 25, 2008

Actionscript Demo; Tweaked


Round 2.

I have done a bit of tinkering to my demo from before. All bugs fixed. It has virtually the same look, but elements have been added to the interface. First of all, now there's a HUD showing your score via a dynamic text box. (1 point per kill.) I also have it set to show a tiny bit of copyright info when you click and drag from the background to a ghost. I also have implemented a slash feature. (Left click, hold, and drag.) Currently, you do not get any points for slashing, but the game does give you props via an animated message.

Tuesday, September 23, 2008

Quiz 2; 9/23/2008

What is the difference between an event handler and a frame event?

Frame events are events that occur within frames on the timeline.  They are written in the actions panel and are set to occur once that particular frame is reached in the timeline.
Example: symbol.gotoAndPlay(12);

Event handlers are events that are triggered upon user interaction.  Usually written in the first frame in a timeline they apply to every frame of the animation unless otherwise noted.
Example: symbol.onRollOver = *action*

Revamped Digiscape and Actionscript Demo

With the 4th week of school comes the ever shortening deadlines in each class. Especially when you're taking two animation classes and a flash class such as myself. Oh well, better finishing late than finishing too late...

....Anyways, here is my remixed digiscape, and actionscript demo.

I took in all the considerations of my classmates and professor and made my digiscape more chaotic. Initially, it was a bit difficult, turning my intricately choreographed ballet into an exhibition of freestyle b-boy battling, but i ended up manipulating and adding animations that aided in my former idea, while expanding even further. This iteration of the digiscape has added the idea of "internet imperfection" into my work. The files act at different speeds, some zipping along with into and out of the background while others crawl forward, sometimes dismantling into their basic file format for easy transferring. Data stalls, shifts, and can get sent to the wrong address. Some reach their destination in parts, waiting to be fully compiled at the end, and others stay in one spot; bad files that are damaged in one way or another.


The Digiscape, now with 50% more action!

My demo on the other hand, is an entirely different story. I got the idea for what i wanted to do over the weekend, and have been working on it since. Long story short, i'm a big fan of old-school light gun shooters like Time Crisis and Duck Hunt, so i wanted to make a tech demo of sorts in the style of those old games.


The ghosts fly into the view with ever-changing patterns. There is no end to them, or is there?

Shoot with the left mouse button. There are no bullets shown on screen or sound heard due to my current skills in flash, but you are treated to a quick death animation while your cross hair rotates as if it was reloading itself. Did i mention that the ghosts try to hide by turning slightly translucent when you mouse over them? Click away. Fight for everlasting peace!

In all seriousness, i have come to remember the kicker that is a logic error. You spend hours reworking your code, writing it, rewriting it, printing, making check marks, and retyping it, wanting to quit bur refusing so because you love what you are making. You want it to be perfect so you search and search for that1 little mistake undetectable by your compiler. When you find it, it is always the simplest fix ever. 4 seconds at the most.

But oh well. I had fun making them.

Monday, September 15, 2008

Final Digiscape


Click the picture to play.

It is done! It is finally done!

Here is my final digiscape. Changes include adding shape tweening elements, tightening the animations of the rows of data, a massive increase in the amount of objects moving from plane to plane (from zero to many) fbf tightening of previous movements, and a bit of finetuning everything else. Nested animations are becoming my best friend, and they are becoming very easy to use.

I will say, however, that much of my success with them are because of the notes i took while animating. It is a big help to plan out what I want to do first, while leaving enough room for experimentation. Thinking about timing and spacing of objects helped as well.

In regards to the data that transfers in between planes, I found my original idea of the squares transferring into shapes to appear more forced than the rest of my work. (too much of the trick showed, not enough magic... if that makes any sense.) So instead of doing that, i went an entirely different route and shape tweened masks for the changed shapes, putting webbed patterns that changed color at different times into my animation. These i think would be a nice contrast to the square data clusters. They represent the inner framework that is used for each piece of data. The programming and coding that goes into digital information. It is, however, not one solid line. The little splits on the sides represent fragmented, imperfect data. The internet is man made, and from time to time, traces of humane programming can be found upon examination.

Thursday, September 11, 2008

(Assignment Write Up:) Animated Digiscape; Iteration 1.


The Digiscape:  A work in progress.

In the first iteration of my digiscape I have animated each row of "land and air locations" on the screen. Each row is animated to scroll at different speeds, simulating the constant movement of information across an infinite sea of data.  To animate the data, I have incorporated different techniques , including motion tweens, nested animations, easing in and out, timing, and motion tracking. Scale, color, and rotation tweens were used when working on the grid.

I had a moment where i was wondering how i wanted the rows of information to spawn.  I played with masks, scale and constrain tweens, but none gave the effect of the creation of information across both planes as well as nested alpha tweens.  I saved a copy of my animation "labeled: backup" just in case i had such a moment of indecisiveness so i could go back, and work a different method out.  This weekend, i will need to animate the red data that moves between each plane.  It will move vertically, tweening from green to red to blue.  I will use alpha blending so the shapes spawn out of the rows of data, fading in and out.

Quiz 1: 9/11/2008

1: What is difference between a symbol and a instance?
A symbol is a vector shape that is stored in your library.  It is editable by double clicking it on your stage or in your library.  They are small in file size and stored as part of your movie.  An instance is a symbol, customized in the properties menu with a distinct "instance name." Editing it will only affect that instance.  In any other scenario, editing any other instance of the symbol (with the same name) will affect all other instances of that symbol, making it easy to make big changes (like color, size, etc) to every iteration of your symbol in you flash movie.

2: What is difference between a frame that has an empty circle and a frame with filled in black circle?
A frame with an empty circle is an empty keyframe.  A frame with a filled in black circle is a keyframe.

3: What are 2 of the main reasons people use flash?
a: Vector-based images do not get damaged in flash when magnified or reduced.  They do not have pixels that show up when zoomed in.
b: File sizes can be optimized due to the low file size of vector graphics, speeding up the process of rendering.  Flash can also import from a wide range of media sources.

4: You can only motion tween a _________?
Symbol

5: How can you tell if an object is a shape or a symbol?
A shape, when clicked has a dotted overlay over it.  A symbol, when clicked, has a blue outline over it, and its registration point in the upper left corner (unless otherwise denoted by the user.)

Sunday, September 7, 2008

Digiscape Update

Update:
  • Finished tutorials.
  • Project imported to flash with all layers indicated.
  • All symbols and extra materials created.

Wednesday, September 3, 2008

Update to Digiscape

...So I went home and experimented with a bunch of different methods and possibilities in regards to animating my data clusters. I tried different sizes, different shapes. I found that the most visually appealing and effective shapes to use were of even sides; mainly hexagons, circles and octagons. I think it would be interesting to animate the data clusters moving at different speeds, and transforming into different shapes as they pass between locations. Everything has been moved to its distinct layer and category, allowing me to manipulate, transform, and copy objects in flash as i please.

I also tried combining my original idea with my final digiscape, which produced a very interesting result:


Digiscape Version 2. New shapes, and a tweaked environment.

I can incorporate the grid in my digiscape as the pathways which electric signals move inbetween. I could animate a current moving along the grid, although it would be harder to do horizontal scrolling with the grid.

...The way i see it, I could either use my original idea, or incorporate some facets of my alternate digiscape, such as the shapes, or grid. Each have their pros and cons to the final composition. I will admit i do appreciate the uniformity of the all-square layout. I can simulate elongated shapes and lines and whatnot by changing the speeds of the squares. I can also keep the grid and the alternate shapes, although animating the grid may be a bit more difficult.

Both iterations of the digiscape are saved in illustrator and elements of each can be mixed and mismatched. Is there one layout that anyone prefers from another?

Tuesday, September 2, 2008

My Digiscape Completed (Write Up and Documentation)

Proccess: The Digiscape: “Data Sea”


First Sketch.

My digital landscape is partially inspired by the coordinate plane. I originally toyed with the idea of points that move through space, into and out of the background. I would simulate the idea of moving along Z coordinates by changing the size of the units as they move between points. My sketch for my idea utilized one point perspective, with all points moving from two surfaces, surface A at the top, and surface B below. Units of information would be transported between points, from top to bottom, and vice versa, indicated by lines drawn between the points.

In progress.

This method however proved a bit troublesome when I began working on the final version of my digiscape. For a while this weekend I would try multiple ideas to indicate movement between the two areas while keeping the entire piece visually interesting. I experimented with portals that would open up and transfer particles between each other, with a cell phone tower that would absorb select particles for processing.


One idea for showing transportation of data.

This was a decent idea, but I did not feel that it would accurately define what i wanted to express as my digital landscape. I did however combine this idea with my first to produce my final digiscape.

My final iteration of my digiscape took a more earthly feel, as I decided to create a distinct digital sky and land, composed of lots and lots of data clusters. Each cluster would move from the sky to the land, or vice versa. As it moves between the two, its hue changes to a transparent red, indicating the data being processed before it reaches its destination. Upon reaching its destination, it blends in with the data clusters around it, awaiting transfer again if ever needed. For every starting point, from the top or bottom, there is a destination created on the other end, even if that destination is the same as the starting point. (Have you ever sent an email to yourself before flash drives became prominent?)


I would like to have more red clusters moving between the planes in the animated version.

I am planning a little ahead in this piece and hope to animate each row of clusters, as well as the bits of data moving from one surface to another. Within each in-progress cluster I want to be able to click it, producing an entirely new digiscape, generating a whole new set of transferred clusters that would demonstrate a potentially infinite creation of information.

Monday, September 1, 2008

Labor Day Weekend Assignment: The Digiscape (in progress)

Over the past few days i have done quite a bit or research on the concept of landscape and how it has evolved through history. Through my research, i have created a list of notes for myself that is helping me create my personal digiscape:

Researching the landscape:
  • Definition: "(1) all the visible features of an area of countryside or land, often considered in terms of their aesthetic appeal. (2) the genre of landscape painting. (3) the distinctive features of a particular situation or intellectual activity."
  • What determines those features?
    • Aesthetics (color, form, space)
    • meaning, relations to current social or political climate.
    • personal imagination
  • Natural Landscape vs. Pre-Meditated (Man Made) Landscape
    • (Man Made) Base reference: "Spiral Jetty" by Robert Smithson
      • Characterized by a desire to go and manipulate the landscape to suit personal interests, whatever they may be.
    • American Landscape by Charles Sheeler
      • More of a photographic reference. Style: "Precisionism." Based around desire to creat exact replication of what is seen.
        • Asks interesting question: "When does the man made landscape for one becomes the natural landscape for another?"
  • Representation of the landscape in alternate media
    • What digital mediums are used to represent landscapes in this era?
      • Video Games and Simulations
        • Grand Theft Auto IV
          • here, here, here, and here,
          • highly detailed render of New York, adapted and slightly modified for the game's setting, "Liberty City."
        • Super Mario Galaxy
          • here, here, (video)here,
          • exact opposite ethic to creating an environment. Purely imaginative, utilizing shifts in gravity and having environments created of many smaller systems networked together.
      • Satellite Projections
        • Google Earth
          • here
          • Used not only for mapping locations from any point in the world, but also as a tool for displaying the connections between one point of the world to another.
          • Supports web 2.0 ideas with user creation.
            • Google Sketchup
            • here
            • Allows user to create environments found on our earth and import them into google earth to help support a fully realized 3-D model of our earth, from landmass to building, etc.
            • CAN create unique environments as well, serving as a tool for the creation of personalized environments.
Our digiscapes are left up to our imagination. The information researched has helped guide my thinking to consider the functions and aesthetics of landscapes created in the past. My latter examples may be commercial in nature but demonstrate the sheer possibility the digital realm gives us to express the landscapes we want to portray. Some of these environments are network-oriented and serve as spaces that we use to interact with other people for various reasons. Their landscapes can be (but are not limited by being) represented by lists of the individuals involved (i.e. youtube, facebook,) or by fully realized environments (World of Warcraft, Second Life.) Every new creation of digital content further expands the landscape we as a civilization has already established. Although it is not readily tangible, save a few keyboard or button presses, it is as much alive as anything we walk around in.

My finished digiscape will support some of the ideas i have expressed. I am still working on it as we speak, but i figured i would post what i have been thinking about as of late in regards to the assignment.

9/2/08 Question

In response to "Web Work: A History of Internet Art,"

Net.art over the last 12 years has had a rich past that seems to have not only expressed social concerns in regards to new media in the world around us, but have also reflected social developments in countries across the globe. These social expressions have given rise to new web technologies that have helped further the development of the internet itself. Is it possible that the next great revolution in net.art will be jump-started by the products of sites like youtube or myspace? What if the cache of these sites will one day be utilized as content (much like the "infamous" copying of the "Documenta X" website) for the sake of expression, detailing the lives of everyone and everything around us?

Wednesday, August 27, 2008

8/28/08 Questions

....first blog post!

(A) In response to the
interview of Vuk Cosic,

Mr. Cosic voiced his opinions on netart's validation by society as a legitimate art form as well as his opinions on the possibility of netart 2.0 in the near future. Could net art's evolution depend on adapting to the growing web 2.0 phenomenon and introducing simultaneous interactivity between multiple people? Is the only way to justify having net art in galleries be embracing the ideas of user-created content and direct interactivity, not only between the art and the viewer but between each individual viewer as well?

-----------------

(B) 
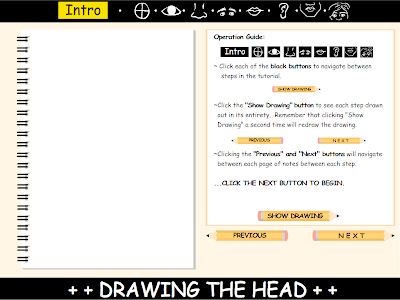
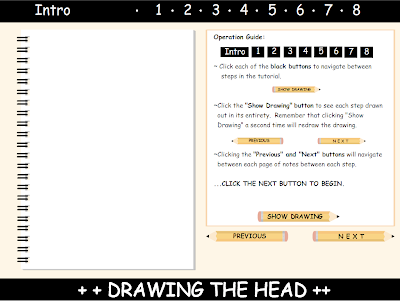
Review of "The Art of Sleep", by Young-Hae Chang Heavy Industries

For those people with selectively short attention spans including myself, "The Art of Sleep" may initially be something one would have trouble sitting through, that is if its commentary of the current international art world was not so hilarious. Clocking in at over 16 minutes, it is a text-based flash video that centers itself around the ramblings of an artist suffering from insomnia. As the individual lies awake in bed, he(or she; the gender is unknown) ponders the definition of art and its role in life, coming across many conclusions that weave in and out of each other, while proving to be ultimately contradictory in nature.

The hilarity of the piece is in its struggle to define art's purpose, as well as the purpose of itself, outside of its satirical nature. Notably, the absurdity of comparing art to dogs, feces, and the alphabet as well as the many asides the artist goes on during the course of the video provides enough humor that keeps the matter at hand interesting from start to finish.

While searching for a work of netart to review, I have found interviews and artist statements which dispute the ability of net art to be considered mainstream. It seems that the biggest strength in "The Art of Sleep" is in its declaration of art as "everything." Although meant to supplement the ramblings of the artist's thoughts, associating art as everything keeps classifications to a minimum. In a way, the artwork is purposefully declaring itself as "just art." This lack of specific classification helps it cross boundaries that keeps it from being disputed as one form of art or another, outside of the tools used to create it. However, with such simplistic text displayed on a white background with a looping jazz track in the background, the means of taking each element and bringing them together can be disputed as well.

---------------------------

(C) Short Response:


Question 1. Since digital media entered the field of art has the perception of art changed?

The inception of digital media has greatly expanded pre-established definitions of art. True enough, art is always changing and always evolving. However, digital media has expanded what we can define as art, as well as the mediums and methods artists can use to create art.

Question 2. A relevant section of digital art represents Internet based art. The Internet hardly existed, but artists conquered already this new field for their artistic activities. Can the work of these early artists be compared with those who work with advanced technologies nowadays? What changed until these days? What might be the perspectives for future developments?

Outside its dated look, net art looked outside itself and referenced (then) current eras as well as eras of old, some of which even drew inspirations from previous art movements. Although we may have new mediums to work with in net art, as well as a "larger canvas" due to ever-increasing file size limits, future net art can be associated with art that came before it and even allude to previous works.

Question 3. The term "netart" is widely used for anything posted on the net; there are dozens of definitions that mostly are even contradictory. How do you define "netart" or if you like the description "Internet based art" better? Do you think "netart" is art, at all, if yes, what are the criteria? Are there any aesthetic criteria for an Internet based artwork?

I consider netart to be a valid art form, and the next opportunity for artists to take advantage of and use to voice their opinions in. Personally, I would use the terms "netart" and "internet based art" interchangeably because of my own considerations that the name for this particular art form only describes the final destination of the work of art itself.

Question 4. Dealing with this new, and interactive type of art demands an active viewer or user, and needs the audience much more and in different ways than any other art discipline before. How do you think would be good ways to stimulate the user to dive into this new world of art? What do you think represents an appropriate environment to present net based art to an audience, is it the context of the lonesome user sitting in front of his personal computer, is it any public context, or is it rather the context of art in general or media art in particular, or anything else.? If you would be in the position to create an environment for presenting this type of art in physical space, how would you do it?

In my opinion, one of the best ways to stimulate user interaction with the work of art would be to stimulate user interaction not only between the work of art and the viewer, but between the viewers themselves. Viewing art has always been something groups of people can enjoy. However, i feel that the context in which works of this type of art is viewed depend on the execution of the work itself, and the conditions under which the work is supposed to be presented.

Question 5.
As Internet based art, as well as other art forms using new technologies are (globally seen) still not widely accepted, yet, as serious art forms, what do you think could be an appropriate solution to change this situation?

One way to change the perception of Internet based art and other new art forms is to try to adapt these new forms of art to growing trends in media and society today. As peer-to-peer interactivity becomes more mainstream, netart could adapt to this trend by using creation and sharing between multiple individuals in its execution and presentation.